Last updated 04/25/2021
If you’ve not heard of Sendy, it’s time you did… especially if you are an independent web host. In short, it’s a self hosted mailing list/newsletter application that leverages the power and price point of Amazon SES to send email blasts cheaply. Well, that is actually huge news for independent web hosts like us because built right into the functionality of Sendy is the ability to bill clients for mailings via PayPal. The installation of Sendy is a snap. I had the software purchased, downloaded, and installed in about 15 minutes, and I was creating test client accounts and mail campaigns immediately.
How Much Can You Make?
Well the math is pretty simple here. The Sendy software package is a one time purchase of $59.
Amazon charges $0.0001 per email sent through SES. What you choose to charge per email is up to you. By comparison, MailChimp charges $0.03 per email. Even if you set your price at a generous $0.01 per email, you stand to profit $99 for every 10,000 emails sent through your system. Not bad, right?
So What’s the Catch?
Here’s the downside with Sendy in its current state. When you opt to set a price per message in the Sendy configuration, your client will be prompted to pay for the campaign via PayPal every time he/she sends one out. This is not ideal for our clients especially if we are already billing them monthly for their web hosting. This may be addressed in future versions of Sendy or via an API plugin as the API functionality grows. However, at the time of writing this article, it is not an ideal setup.
Can I Integrate Sendy with WHMCS Billing?
This is the exact question I asked myself. If I could put the mailing list charges on the same monthly bill as my clients’ hosting, it would be perfect! As a web host, you are probably already using WHMCS for your billing. If not, I’d highly recommend you consider it. (Check out the WHMCS Website for details)
I spent a good two days hacking away at both WHMCS and Sendy to make it possible for me to bill mailing list usage through WHMCS on a per client basis. It does take some effort to get everything set up, but it is very possible, and I’ve documented the process here for you.
Prerequisites
There are a couple of things assumed before you start:
- You already have WHMCS installed and configured and you are using it for your hosting. I am using version
6.3.17.17.10. - You should install Sendy on the same server as WHMCS but under a different cPanel hosting account (or whatever web panel you are using) (Sendy installation instructions are here). I am using
2.1.02.1.2.73.0.55.1 - You have already configured your Amazon SES account. (The Sendy installation instructions address how to do this quite well, and the software warns you when something is not configured properly. Setting up the Amazon AWS account is outside of the scope of this tutorial)
- You will need the MySQL information for both WHMCS and Sendy. You can use the individual MySQL usernames and passwords for each application or you can create a new username and password that has access to both databases.
- You have purchased the Sendy WHMCS Integration Script (it’s seriously cheap and helps support this blog)
- Once you have Sendy installed and linked to Amazon SES you’re ready to get started.
Overview
Here’s a quick break down of the steps we’re going to take to make this work:
- Create an API User in WHMCS for the Integration Script
- Configure A Mailing List Product In WHMCS
- Setup the Integration Script
- Add the Integration Script to Chron
- Modify Sendy Application files to prevent deleting of campaigns from the database
- Test the setup
-
Create an API User in WHMCS for the Integration Script
Part of the way the integration script works is by communicating with the WHMCS API. So the first thing we need to do is create a user that the script will use to do that. While you could use the Administrative user that you use to manage WHMCS, for added security I recommend you use a separate one. Before we create the API user, let’s first create an API group (if you don’t already have them).
- Log into WHMCS and goto Setup -> Staff Management -> Administrator Roles
- Click Add New Role Group at the top and call the group something like API Only.
- Click Continue
- On the next screen in the Permissions section, check API Access. All other permissions boxes should be left blank.
- Click Save Changes.
- Now go to Setup -> Staff Management -> Administrator Users
- Fill in the settings as follows:
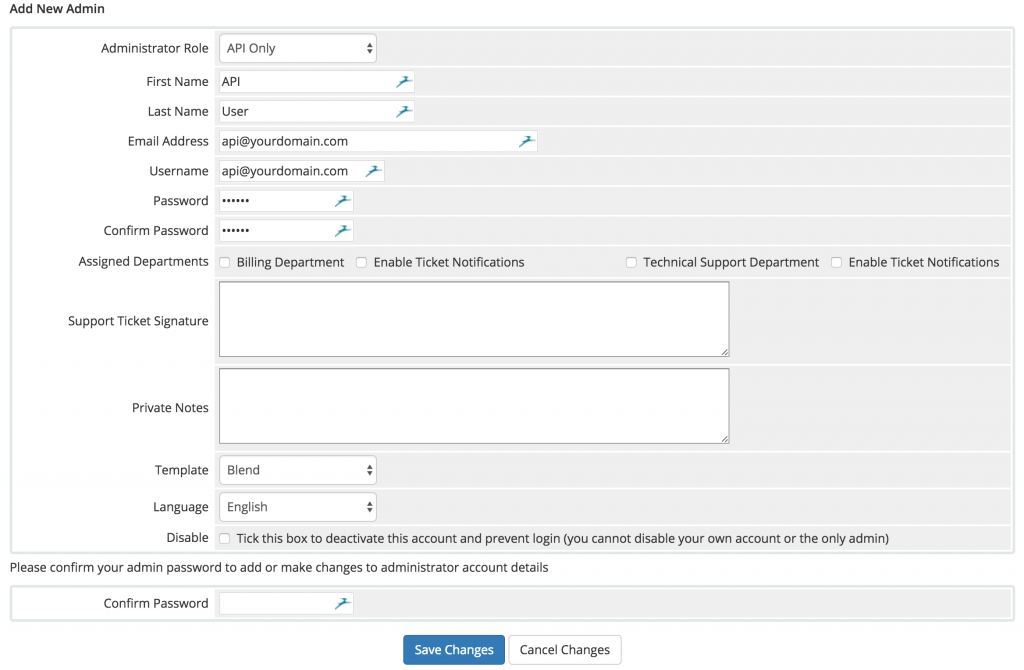
Be sure to record the username and password to a safe place as you will need it for the integration script.
-
Configure A Mailing List Product In WHMCS
We need a way for the integration script to know which customers have the mailing list service. You can choose to charge a flat base rate for the service if you would like, however, since I was going to be charging for each email individually, I opted to make the service itself free.
- From WHMCS, go to Setup -> Products/Services ->Products/Services
- Click Create New Product (I’m not going to walk through the details of creating a product in WHMCS as these may vary based on your needs. But I will give you the important settings that are required.)
- On the Details Tab, I chose to keep this product Hidden from order forms because there is a slight manual process to setting up a new client.
- On the Custom Fields tab, Create a new text box field and call it Mail_ID and set it to Admin Only.
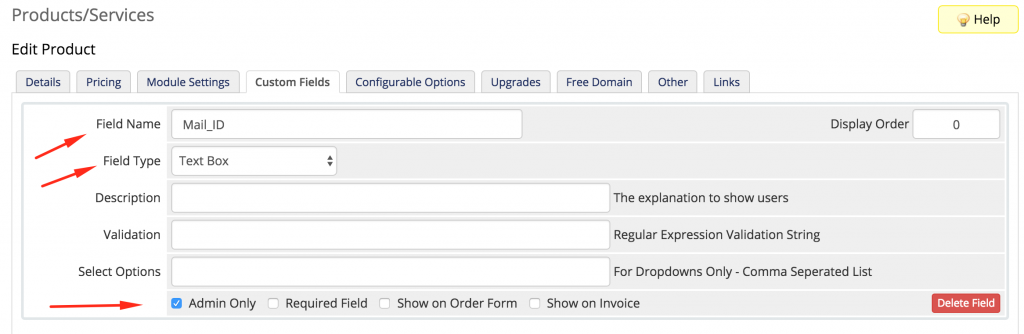 Save Your Product.
 - Now Go back into the Product you just created as if you were going to edit it. We need to retrieve the product id. This can be seen in the address bar when you are in the edit Product window. It looks like this:

In this case, the product ID is 36. You will need to put this number in the whmcsProductID variable of the integration script in the next step.
-
Setup the Integration Script
This is the heart of the whole operation– the Integration Script. This program represents a good deal of trial and error on my part. I spent the better part of two days refining it, and I’m selling it here for less than a latte ($2.99). Of course, I’d recommend you pick yourself up a copy and save yourself some time, but if you’d rather code it yourself, the product page includes a description of what the script does.
- Before you upload the script, open it in a text editor and edit the variables at the top of the file. You will need to product ID, the WHMCS and Sendy mySQL database credentials and the WHMCS API credentials we created above. This is also where you will set your price per email. Once you have these variables configured, save the file.
- The script is coded in php and we will be calling it via the php command line via cron. Because it’s command line, you can really put this script anywhere on your server. For security: Do not place it in a web facing folder such as your public_html folder. I put my script in a billing folder under the cPanel account that I setup for Sendy. To the right you can see that the billing folder is at the same level as public_html

- Upload both the batch.php and lastrun.txt files to the same directory. (Again, I placed mine in the billing folder.)
-
Add the Integration Script to Chron
- From the cPanel account where you placed your integration script, select Cron Jobs
- The command to run the script is called with the php -q command:
php -q /home/yourhomefolder/billing/batch.php - You can choose to run the script as often as you would like as it won’t double bill. However, it’s best to match the timing with your billing cycle to reduce the number of billable line items. In my case, I chose to run the script once a month on the 28th of every month at 11:50PM. I chose this time because it will give it time to finish before my WHMCS cron jobs which run at midnight, and the 28th is the last day of the shortest month. It doesn’t really matter what day of the month you run it as the script will total everything up from the last time it ran. Mine cron looks like this:

- (If you are not using cPanel, you can do the above via command line using crontab -e.
-
Modify Sendy Application files to prevent deleting of campaigns from the database
After I had the script working and campaigns were successfully being billed to WHCMS, I made a terrible discovery. From within Sendy, users have the ability to delete campaigns when they are done with them. Not only does the campaign disappear from the front end, but all evidence that it ever existed gets removed from the database as well. This means a user could send out 20,000 emails and then remove the campaign and the billing script would never find it. This won’t do! Fortunately, Sendy is open source and there are only a few small changes we need to make to allow users to still delete the campaigns as they see fit, while still allowing us to bill for successfully sent campaigns.
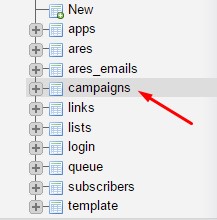
- Log into the cPanel account for Sendy and launch phpmyadmin
- Locate your Sendy DB and open the campaigns table by clicking on it.
- Then Click on Structure at the top of the page
- We are going to add a “deleted” field to the table. At the bottom of the field list you will see this:
 Click Go.
- Make your new field look like this:
 Click Save.
 - You can close out of phpmyadmin.
- Now we need to make a couple changes to some Sendy files. You can do this via the cPanel file manager, SSH, or FTP.
- Locate the following Sendy file and make a backup copy of it: /your_sendy_directory/includes/campaigns/delete.php
I usually just copy it and place something like .original at the end of the filename.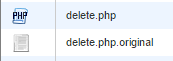
- Open up delete.php in an editor.
- Look for this line:
$q = ‘DELETE FROM campaigns WHERE id = ‘.$campaign_id.’ AND userID = ‘.get_app_info(‘main_userID’);
Replace it with this:
$q = “UPDATE campaigns SET `deleted` = ‘1’ WHERE id = “.$campaign_id.” AND userID = “.get_app_info(‘main_userID’);This is the query that gets executed when a user deletes a campaign. In this case, we are changing the query to update the campaign and simply mark it as deleted. You will see in the file that there are other executions to remove other pieces of the campaign. That’s fine. We don’t need those. - Save your change.
- Now locate this file and make a backup copy of it: /your_sendy_directory/app.php
- Open app.php in an editor.
- Look for this line (around line 93):
$q = ‘SELECT * FROM campaigns WHERE userID = ‘.get_app_info(‘main_userID’).’ AND app=’.get_app_info(‘app’).’ ORDER BY id DESC LIMIT ‘.$offset.’,’.$limit;
Replace it with this:
$q = ‘SELECT * FROM campaigns WHERE userID = ‘.get_app_info(‘main_userID’).’ AND app=’.get_app_info(‘app’).’ AND deleted = 0 ORDER BY id DESC LIMIT ‘.$offset.’,’.$limit; This is the query that executes when a user browses his campaigns. Here, we are just modifying the query to only show campaigns that have not been deleted.
-
Test the Setup
That’s it as far as configuration goes. If you followed the above instructions, you should have a working system. However, at this point we just need to configure a client. For this, I recommend using a test or internal client.
- Login Sendy and Create a new Brand
- On the right side of the page make sure you set the client email. Also set the delivery fee and the recipient fee to ‘0’. If you set these to a positive value, sendy will prompt the user for paypal credentials. (See below)
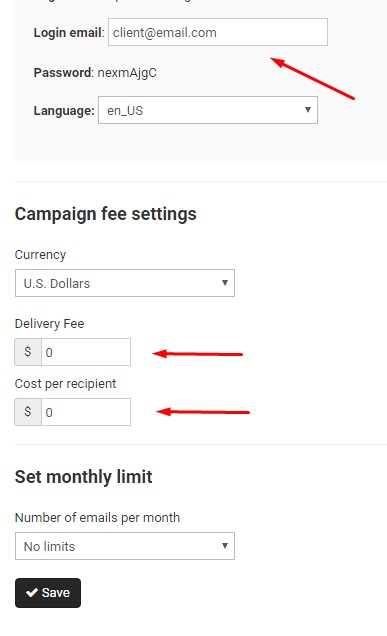
- Click Save
- Now We need to retrieve the Brand ID from the sendy main page. It will look like this:
 In this case the Brand ID is 1. This is the number we are going to put into WHMCS.
 - Login to WHMCS and create an order for the Mailing List product you created back in step 2. When you select the Product/Service a custom fields area should display. In Mail_ID, place the Brand ID you retrieved from above. It should look like this:

- Submit and Accept the Order

That’s it! To test it, send some emails using the Brand you created in Sendy. Once you have done that, you can manually run the integration script. You can do this via command line:
Browse to the directory and run: php -q batch.php
Now check the Billable Items for the account in WHMCS. You should see a line that looks something like this:

This will be billed on the user’s next invoice.
We made it. Of course, if you have any questions about this process or if you feel part of these instructions are not clear, let me know in the comments below.
- Integrate Sendy with WHMCS Billing for less than a Latte - April 25, 2021
- Can I Really Make Money With Web Hosting? - July 5, 2016
- Can Independent Web Hosts Be Competitive? Here Are 3 Proven Ways - July 1, 2016


Any chance of it supporting WHMCS 7.1?
Hi Myles. I apologize for the extremely late reply. I get so many spam comments on this site that your comment got over looked. Anyway, good question. I am running WHMCS 7.1.x and the above method still works just fine. At some point I’ll update the documentation. 🙂
I ran into a problem when follwoing your instructions at step 14.
Look for this line (around line 93):
$q = ‘SELECT * FROM campaigns WHERE userID = ‘.get_app_info(‘main_userID’).’ AND app=’.get_app_info(‘app’).’ ORDER BY id DESC LIMIT ‘.$offset.’,’.$limit;
Replace it with this:
$q = ‘SELECT * FROM campaigns WHERE userID = ‘.get_app_info(‘main_userID’).’ AND app=’.get_app_info(‘app’).’ AND deleted = 0 ORDER BY id DESC LIMIT
When i changed the code i got white screen on the campaigns section
I would like your help on solving this
Hi Sheldon,
Did you copy the full line exactly? (You were missing the last part of it in your question so I just want to makes sure) Generally a white screen means you missed a semi-colon on a line somewhere.
Here is what you should be using:
$q = ‘SELECT * FROM campaigns WHERE userID = ‘.get_app_info(‘main_userID’).’ AND app=’.get_app_info(‘app’).’ AND deleted = 0 ORDER BY id DESC LIMIT ‘.$offset.’,’.$limit;
Let me know if that solves your problem.
Thank you to all those who have purchased the integration script. Your feedback has been appreciated. As far as I know, we are still the only ones who are doing this integration. We now have 17 clients running their mailing lists through Sendy and billing through WHMCS. Everything has been working great.
I am testing this script with sendy version 3.05 today. So far everything appears to be working. I will update this page with the results.
Hi Curtis,
I have just purchased the script and set it all up, for some reason when running the script it will not create the billable item.
Do you know what the problem might be? Feel free to email me.
Hi James. Thanks for your purchase. I will email you shortly.